CYANOTYPES:
General Information: Rockland's Blueprint is a classic process for producing a blue image on paper or cloth. The process requires a source of bright blue or actinic light for exposure plus a full-size negative. It is very easy to expose and develop blueprint paper. You do not need a dark room. The blue-print solution is coated on the paper in dim room light by dipping, brush or spray. The wet surface can be dried with a hair dryer, also in room light. A photographic negative is then laid over it, (or a drawing in black ink on clear plastic or tracing paper can be used in place of a negative).
Making a full-size negative: A convenient way is with Rockland Liquid Light or Ag-Plus photographic emulsion on glass or prepared acetate. Another method is with Kodalith film, by developing it in standard paper developer instead of Kodalith developer. The easiest method is by scanning or using a digital camera and printing a full-size transparency with an inkjet or laser printer. Or you can order a transparency from an office store like Kinko's.
To prepare the stock solutions: Rockland Blueprint consists of 2 parts labelled A & B; iron salts in one bottle and activator in the other. The stock solutions should be stored in their original containers. Keep all containers out of the reach of children.
Preparation: Under dim incandescent light, (not fluorescent or daylight), mix equal quantities of the A & B solutions to make a sensitizing solution. Mix only as much as you need for a period of several weeks, as the shelf life is limited after the stock solutions are mixed (kept in separate bottles, the stock solutions can be stored indefinitely). If convenient, let the sensitizing solution ripen by aging overnight, to improve the contrast.
Coating: Use with any absorbent paper or with cloth. Saturate the material with the made-up sensitizer solution, blot away excess solution and dry in a dark place, preferably with a fan to circulate the air.
Exposure: Expose with sunlight, a high-power halogen bulb or other bright blue-rich light source, with the transparency held in contact with the sensitized surface by a pane of single-weight window glass. The length of exposure determines how light or dark the tones of the blueprint will be. The longer the solution is exposed to light, the darker it gets. About five minutes of bright sunlight in the middle of the day, or an equivalent time exposed to a bright actinic source should yield a strong, rich print. Standard tungsten light bulbs lack adequate radiation and are far less effective. You can see the tones of the print become darker as exposure proceeds. It is generally a good idea to let the print become darker than you ultimately want it, as the washing process will lose some contrast.
Washing: Running tap water is all that is needed to develop and fix the blueprint image. The exposed print is washed until the yellow solution that remains has been washed away and the image is pure blue and white. The fabric or paper can then be dried and pressed, if necessary, with a warm iron.
MY WORK:
I made some acetates of a variety of images I had taken to prepare to make some cyanotypes of my own. Following the instructions above I have produced the following cyanotypes; I found the procedure very interesting and fun along the way and I was extremely pleased with the results.
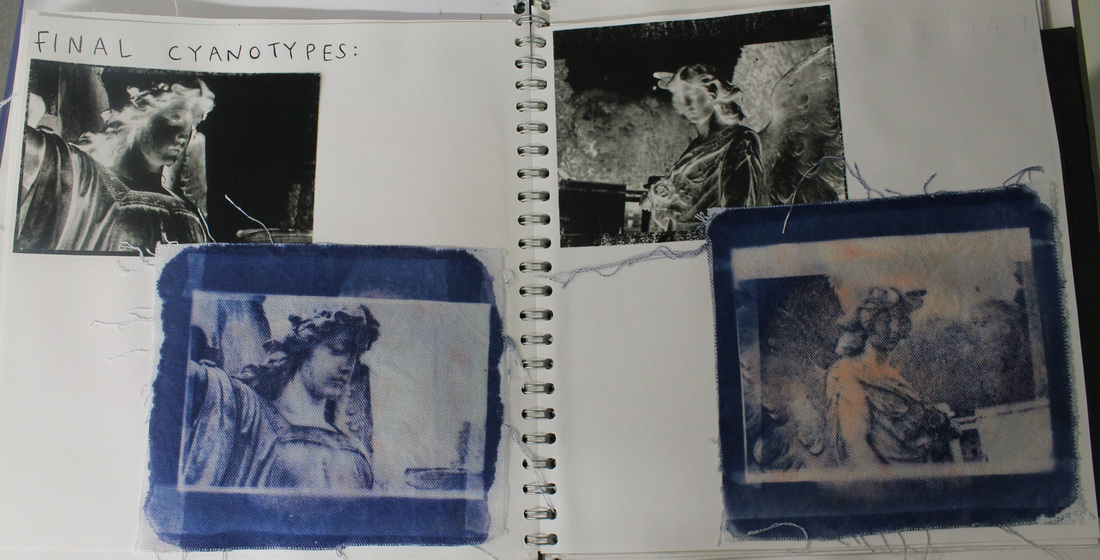
I created these Cyanotypes by following the instructions above and carefully selecting a high contrast acetate to ensure that you could fully see the image as I wasn't sure how much detail a Cyanotype would show. The cyanotype on the left has turned out very well: you can see the difference between the dark blues and the lighter hues that are clearly shown in the acetate and the ink hasn't leaked onto the background through the developing and washing process which has enabled me to produce a piece with a white background. It is very hard to get this right on a Cyanotype as when you go to develop the fabric in the sunlight is the acetate is not properly fixed down then the UV rays will enable other parts of the image to develop. The Cyanotype on the left has not worked as well because when I applied the Cyanotype dye on the table in the dark room there was some residue of Inkodye left and this had been absorbed by the fabric. This meant that as I developed this piece the Inkodye gave an orange tinge to some of the image and meant that I didn't get the clear contrasts that I did in my first Cyanotype. This was a bit of a disapointment as I wanted this Cyanotype to show all of the highlights and shadows and to show off the compositions and structure of the image but unfortunately this mistake has made the finished piece look blurred and the image is not as focused as I would of hoped.
I do like using this process as I think the finished piece looks very effective and the process itself allows you to experiment with developing times to create different looks and shades of colour within the image. I might look into creating more images using this process after this initial experimentation and I may also experiment with using different materials to print onto to see if it changes the final effect.
I do like using this process as I think the finished piece looks very effective and the process itself allows you to experiment with developing times to create different looks and shades of colour within the image. I might look into creating more images using this process after this initial experimentation and I may also experiment with using different materials to print onto to see if it changes the final effect.
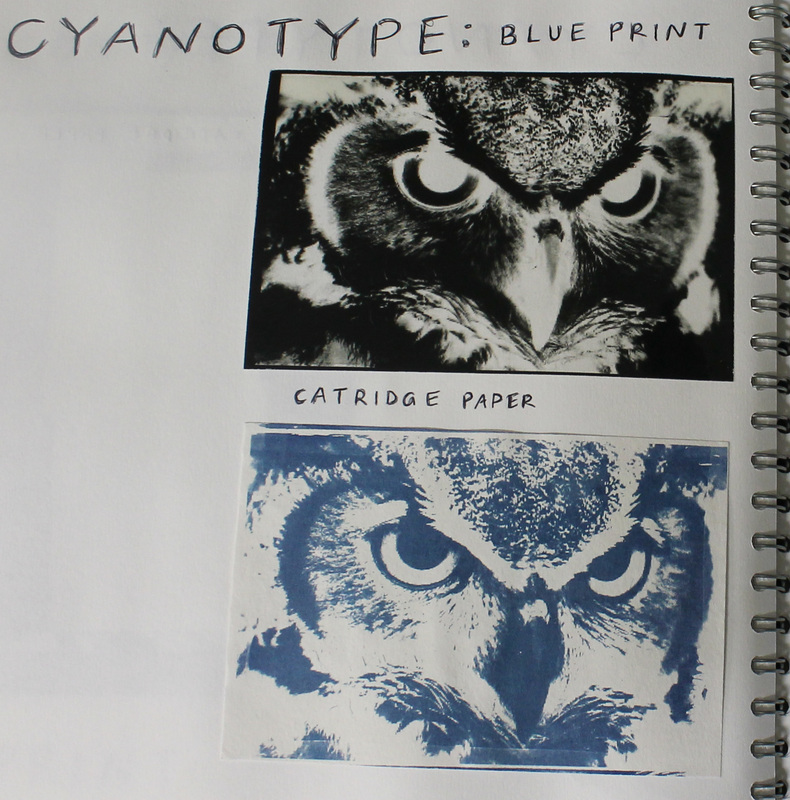
This Cyanotype was printed onto Cartridge Paper rather then the material I had been using in previous experiments as I wanted to see how much better or worse the paper performed as the recipient to the dye. I found it harder to stick my acetate onto the paper as during the process that paper had begun to curve slightly so it meant that the edges of the acetate didn't match up to the edges of the paper fully and when it came to developing my image I found that the paper began to curve again which caused some blurring to the image around the edges of the piece. However, I do like the effect that this has given my final outcome as it seems to go slightly 'out of focus' towards the edges of the image which gives a distorted illusion and it brings the owls eyes to the center of focus. If I were to do more Cyanotypes I would experiment with using Cartridge Paper again as it brings a nice overall effect and hopefully the blurred edges will not occur again.
|
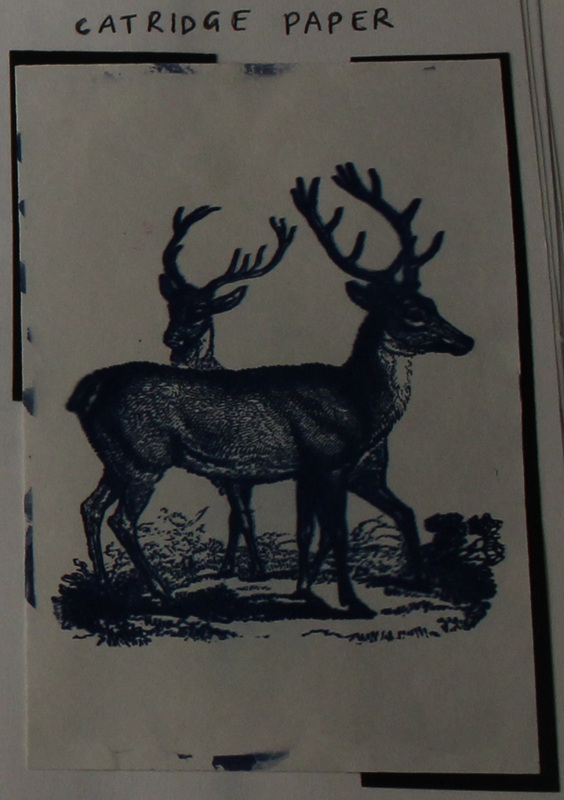
In this Cyanotype I experimented again with the Cartridge Paper only to find that the blurred lines appeared again after the developing process even though I took more caution when sticking my acetate to the paper. I found that as the sun carried on drying the paper even more it curved slightly, leaving the outer edges of the acetate slightly lifted from the paper which allowed a small amount of sunlight to get beneath the blacked out parts and cause the sharp lines to expand slightly and blur. I then thought to use a piece of glass to ensure that the paper and acetate lied flat against one another at all times but I did not get a chance to experiment with this method to see if it worked. I do like the way Cyanotypes work and the outcome it gives when it works well but I find the process too difficult to get right and the detail in the images is lost through the process. |
